Tuesday, April 19, 2011

Sweet Seder: Chocolate Passover Torte

Growing up very Southern and very Catholic, my only experience of Passover was the biblical story told every year during "Passover Sunday" mass--fleeing Egypt, no time for the bread to rise, forty years in the desert.  Now that my circles are wider, and I have some Jewish friends, I've had the privilege of a much broader experience of Passover. 

This was especially true when, a few years ago, my friends Elizabeth and Dennis invited me to Passover Seder.  I learned a lot, I ate a lot, and (thanks in part to the chocolate torte I brought) I've been fortunate enough to be invited back.  Mazel tov!

So, baking for Passover is tricky.  First, there's the no flour rule.  No wheat flour, no rice flour, no corn starch, no nothing of the kind.  Second, since the meal is often one that is meat-based, there's the no dairy rule.  Fortunately, my good friends at Epicurious.com were not deterred...


Passover Chocolate Torte with Raspberry Sauce

8 ounces bittersweet (not unsweetened) or semisweet chocolate, chopped
1 cup (2 sticks) unsalted kosher-for-Passover pareve (non-dairy) margarine
8 large egg yolks
1 cup plus 1/3 cup sugar
5 large egg whites
Paper doily
Fresh raspberries (optional)
Raspberry Sauce

Preheat oven to 350°F. Line bottom of 9-inch-diameter springform pan with 2 3/4-inch-high sides with parchment paper. Stir chocolate and margarine in heavy medium saucepan over low heat until melted and smooth. Remove from heat. Cool until lukewarm.

Using electric mixer, beat yolks and 3/4 cup sugar in large bowl until pale and very thick, about 4 minutes. Add chocolate mixture in 2 additions and beat until well blended. Using clean dry beaters, beat egg whites in another large bowl until foamy. Gradually add 1/4 cup sugar and beat until whites are stiff but not dry. Fold 1/3 of whites into chocolate mixture. Fold in remaining whites in 2 additions. Transfer batter to prepared pan.

Bake torte until crust forms on top and tester inserted into center comes out with some moist batter and some moist crumbs still attached, about 55 minutes (top may crack). Run small sharp knife around torte to loosen. Cool in pan on rack (torte will fall and crack). Remove pan sides. Invert torte onto platter. (Can be prepared 1 day ahead. Cover with cake dome and store at room temperature.)

Grind 1/3 cup sugar in blender until fine powder forms. Place doily atop torte. Sift ground sugar over doily; gently remove doily. Garnish torte with raspberries, if desired. Serve with Raspberry Sauce.

Raspberry Sauce
2 12-ounce packages frozen unsweetened raspberries, thawed, with juices
1 cup sugar

Purée raspberries with juices and sugar in processor until smooth. Transfer mixture to strainer set over bowl; press on solids to extract as much liquid as possible; discard solids in strainer. (Can be made 2 days ahead. Cover and refrigerate.)

Literate Baker notes:  You can save yourself a bowl, a beater, and a whole lot of trouble by whipping the egg yolks and whites with the full cup of sugar until thick and pale yellow.  You'll still get a really nice rise.  Also, the ground sugar is a pretty decent substitute for confectioner's sugar, but I like the crackly top and don't think it's necessary.

In addition to being Passover-friendly, this recipe is a great choice if you need a gluten and/or dairy-free dessert.  It is reminiscent of chocolate souffle and always a crowd pleaser.  I mean, it's no matzoh ball soup, but it will definitely...

Keep it sweet.
Pin It

Thursday, April 14, 2011

Hey... Granola Is Baked!

A couple of weeks ago, I had a baking day with my friend, Lorna.  Although there was snow on the ground, our thoughts were of spring.  We played with berries and with rhubarb; the resulting cake and pie were lovely and bright.  We also dabbled in granola.

I know it isn't hard, but I've never made it.  Lorna, my uber awesome, uber healthy friend, has made it lots of times.  I brought the wheat germ and got jiggy with it.  (Yes, I'm sure that Will Smith never intended that phrase to be applied to wheat germ.  He's not here, though, is he?)

So, according to Lorna's recipe from the More With Less cookbook, here's what you do:

Preheat oven to 250 degrees.

Combine in large mixing bowl:
2 c. whole wheat flour
6 c. rolled oats
1 c. coconut
1 c. wheat germ

Blend together separately:
1/2 c. water
1 c. oil
1 c. honey
2 t. vanilla
1 T salt

Add blended liquids to dry ingredients and mix thoroughly.  Spread out on 2
greased cookie sheets and bake 1 hour, or until dry and golden.  Store in
covered containers.  Makes 2.5-3 quarts.

Before.
After.

The beauty of granola is that you can add any combination of things you like and things you have around.  I got pumpkin seeds because I don't think they appear in enough things; there were walnuts in my freezer.  Lorna had a plethora of dried cranberries; I had currants left over from my Irish soda bread adventure.  I also managed to use up some fairly crystallized basil honey and the dregs of a honey bear.  You only need to remember exactly what you did if you want to make it exactly the same the next time.  And who wants to do that?

In theory, I eat it 1/4 cup at a time with yogurt.  In reality, I eat it by the handful every time I walk through the kitchen.  Or have a bored moment at my desk.  (My share of the batch still managed to fill two containers.)


That said, there are worse things to eat by the handful.  You should give it a try; it's the whole-grain way to...

Keep it sweet. Pin It

Thursday, April 7, 2011

Light & Lazy: A New Take on Cheesecake

I've mentioned before that I love cheese.  I love cheese almost as much as I love chocolate.  Almost.  Incorporating cheese into dessert is like the best of both worlds.

Cheesecake is perhaps the quintessential example of what happens when cheese goes sweet.  Cheesecake is also the quintessential uber fattening dessert.  Brick after brick of cream cheese, eggs, sugar, butter--it's serious business.  It's also hard to justify making one for no good reason.  So what is a cheese-loving girl to do?

Well, it isn't technically baking, but the Literate Baker has a super fast, super easy dish that's a whole lot lighter than the original.  I'll call is a cream cheese fluff.  Yeah.  Fluff.

8 ounces cream cheese
1/4 cup sugar
1 teaspoon vanilla extract
1/2 teaspoon almond extract
1 8-ounce tub light whipped topping

Beat the cream cheese and sugar until light and smooth.  Add the extracts and beat some more.  Add about 1 cup of the whipped topping and stir to combine.  Fold in the remaining remaining topping.


The concoction could be spread in a graham crack crust.  Or eaten with a spoon.  Or, you could do what I do--serve it like a dip with some graham crackers and fruit.


So, it isn't healthy, but it sort of looks it, no?  It's relatively light.  It delivers that tangy delightfullness that one looks for in any cream cheese treat.  It can also be made in about four minutes.  Can't beat that for a quick and easy way to...

Keep it sweet.
Pin It

Tuesday, March 22, 2011

Chai Scones: A Spicy Twist for a Tea Party

This Friday, Foodbuzz and Electrolux are partnering to sponsor a Tea Party Top 9 Takeover.  Foodbuzz Featured Publishers (like me!) are submitting tea party themed posts.  The best part?  Foodbuzz is donating $50 to the Ovarian Cancer Research Fund for every recipe created by a Featured Publisher!  Who could resist?  Even better, all of you, dear readers, can participate.  Visit Kelly Confidential where you can join Kelly's virtual tea party for a cause. When you do, Electrolux will donate $1 to the Ovarian Cancer Research Fund.

So, jolly good fun.  But the question remained: what to make?  Well, I'm no history buff, but I've always enjoyed seeing the various ways British and Indian cultures have influenced each other.  I decided to apply this concept to a tea party, namely scones.  (I am a baker after all.)  And thus was born the Literate Baker's Chai Spice Scones.

Chai Spice Scones

2 cups flour
1/4 cup sugar
1 teaspoon salt
1 tablespoon baking powder
1 tablespoon chai spice powder
1/3 cup crystallized ginger, chopped
3/4 cup butter (1 1/2 sticks), cut into cubes
1/2 cup heavy cream
2 eggs
1 teaspoon vanilla extract

For top:
1 egg, beaten with 1 tablespoon water
1 tablespoon raw sugar


Preheat oven to 400 degrees.
Combine dry ingredients and crystallized ginger in a large bowl.  Add butter and blend until the butter is the size of small peas.  Meanwhile, combine wet ingredients in a measuring cup or small bowl and beat with a fork to combine.  Add to the dry ingredients and blend just until a soft dough forms.

Dump dough on a floured surface and knead a couple of times.  Pat or lightly roll to 1/2-inch thickness.


Cut with your favorite 2 or 3-inch cutter and place on a baking sheet lined with parchment paper.Brush with egg wash and sprinkle with raw sugar.


Bake 18-20 minutes until golden brown.
Makes 14-16 scones.


To turn these scones into an full-fledged tea party, add some little sandwiches (egg salad spiked with a touch of curry, perhaps?) and a pot of your favorite full leaf.  Chai, of course, would be lovely, as would a nice Earl Grey, of you're into that sort of thing.

Of course, scones don't need a reason.  Neither does a party dress.  But throw put them together and throw in a few friends, and you've got yourself a tea party.  And there's little lovelier that that.  That said, if it's a Tuesday and you find yourself at the office, this will do just fine.


Either way, always make time for good food and good company and always...

Keep it sweet. Pin It

Thursday, March 17, 2011

Kiss Me Even Though I'm Not Irish Soda Bread

I'm not Irish.  Not even a little.  Not even if I'm drunk on Bailey's and singing off key.  That doesn't mean I can't celebrate St. Patrick's Day.  And by celebrate, I mean bake for.  Obviously.

This year, I decided to try my hand at Irish soda bread.  Generally speaking, soda bread has a lot going for it.  One: it's fast and easy and does not require any proofing time whatsoever.  Two: it's an excellent vehicle for butter.  Three:  who needs a three when you have the first two?

My go-to girl Ina Garten made it a while back, so I tracked down her recipe at the always-helpful FoodNetwork.com. 

Irish Soda Bread

4 cups all-purpose flour, plus extra for currants
4 tablespoons sugar
1 teaspoon baking soda
1 1/2 teaspoons kosher salt
4 tablespoons (1/2 stick) cold unsalted butter, cut into 1/2-inch dice
1 3/4 cups cold buttermilk, shaken
1 extra-large egg, lightly beaten
1 teaspoon grated orange zest
1 cup dried currants

Preheat the oven to 375 degrees F. Line a sheet pan with parchment paper.

Combine the flour, sugar, baking soda, and salt in the bowl of an electric mixer fitted with the paddle attachment. Add the butter and mix on low speed until the butter is mixed into the flour.


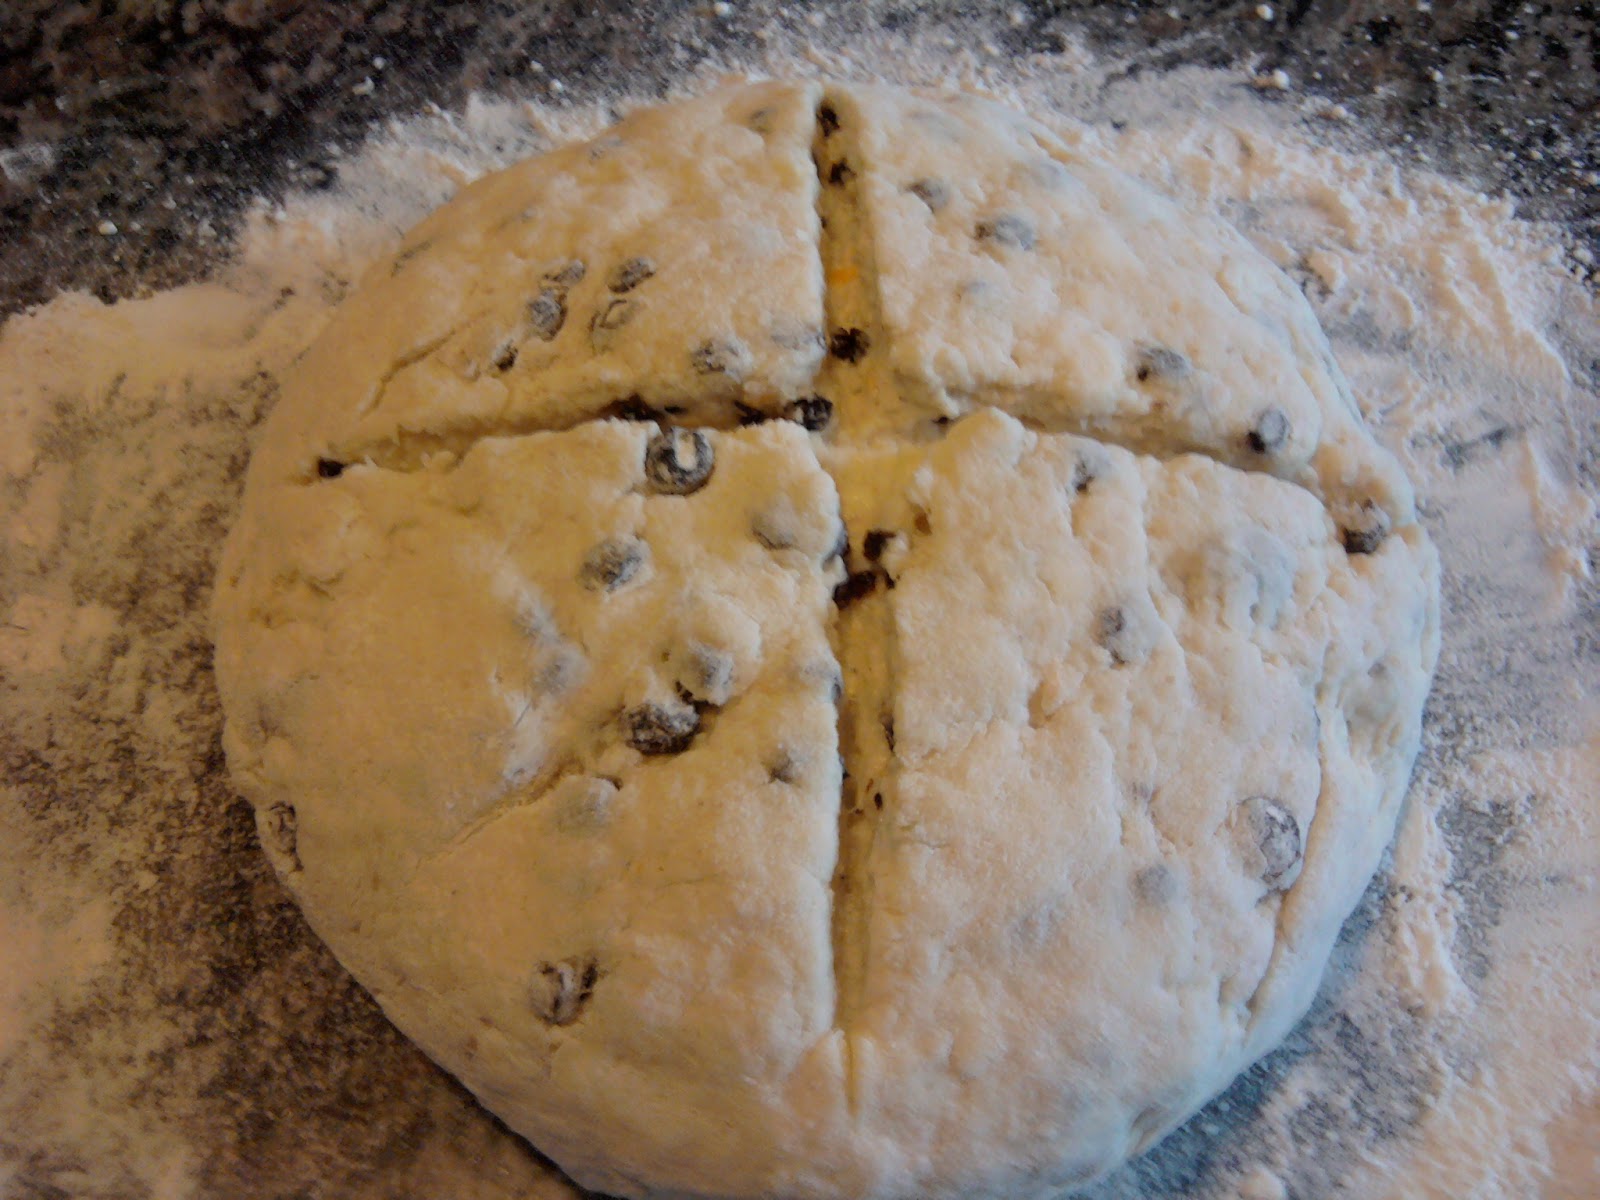
With a fork, lightly beat the buttermilk, egg, and orange zest together in a measuring cup. With the mixer on low speed, slowly add the buttermilk mixture to the flour mixture. Combine the currants with 1 tablespoon of flour and mix into the dough. It will be very wet.


Dump the dough onto a well-floured board and knead it a few times into a round loaf. Place the loaf on the prepared sheet pan and lightly cut an X into the top of the bread with a serrated knife.


Bake for 45 to 55 minutes, or until a cake tester comes out clean. When you tap the loaf, it will have a hollow sound. Cool on a baking rack. Serve warm or at room temperature.

Literate Baker notes:  I didn't toss the currants with flour.  I generally only use that technique with thinner batters.  Also, instead of a sheet pan, I preheated my pizza stone in the oven.  The result was extra crusty yumminess.  Oh, and leave the other half of that stick of butter on the counter.  You're gonna need it.


The overall result?  I've spent every moment since wondering why I haven't been baking Irish soda bread at every possible opportunity.  It literally comes together in minutes.  The texture and great and, with a heavy schmear of butter... wow.  I think it would play well with other flavor additions, too.  Like dried cherries.  Or cheese.

Do yourself a favor and whip up a loaf right this minute.  You'll be so glad you did.  Happy St. Patty's Day all!

O'keep it sweet.
Pin It

Tuesday, March 15, 2011

Chipwich for Mitch

I have a confession.  Sometimes, I get tired of cake.  There, I said it.  It's not like I ever stop loving it, it's just that, when it's around all the time, it stops feeling special.

The upside of this is that I tend to get a little adventurous when it comes to celebrating the birthdays of my nearest and dearest.  Most recent case in point?  The giant chipwich.


Now, I love sandwiches. Love them. If you factor in all of the possible variations, I could eat a sandwich for every meal of every day.  I also love dessert sandwiches.  Dessert sandwiches?  Oh yeah.  Perhaps you've forgotten the double doozy incident of last summer.

To make:  Bake a half batch or so of your favorite chocolate chip cookie dough in two 8-inch cake pans that you've lined with parchment paper.  (I'll tell you a secret... my super awesome signature chocolate chip cookies recipe is a very subtle variation of the Toll House cookie.)


Allow cookies to cool in pan.  Loosen edges with a butter knife, invert onto the counter, and remove parchment.  Line one of the pans with plastic wrap.  Place one cookie in the pan. Spread with 3-4 cups of softened ice cream (I like chocolate).  Top with remaining cookie and freeze for at least two hours.


Before serving, remove from pan and place on a serving plate.  Press chocolate chips into ice cream around the edge.  Cut with a large knife that has been dipped in hot water.


This definitely takes the giant office cookie to the next level.  You can even write on it.  Or douse it with homemade butterscotch sauce.  If you had some lying around.  Either way, when it comes to selecting your next birthday cake, remember to keep it interesting and...

Keep it sweet. Pin It

Monday, March 14, 2011

Happy Pi Day

I love a culinary pun as much as the next person.  What am I saying?  I love a culinary pun a lot more than the average person, I'm sure.  Which is why I love Pi Day. 

For anyone not in the know, pi (a.k.a. π) is the relationship between a circle's circumference and its diameter,  roughly 3.14.  It is celebrated, of course, on March 14th (a.k.a. 3/14).  In addition to pastry pun fun, Pi Day reminds me of those long ago days when I was a stellar math student.  It's also a perfect excuse to bake and eat pie.  What's not to love?

Pi Day is being celebrated all over the place.  At the University of Rochester (my Alma mater), there are lectures a-go-go by professors of mathematics, physics, and chemistry.  There's also a fun little feature on the website that makes note of the potential of double pies on June 28, since we so often note circumference as 2πr.  I love the way they think; my calendar is already marked!

But let's not get ahead of ourselves.  What pie is worthy of the occasion?  Chocolate cream?  Bourbon pecan?  Lemon meringue?  Oh, I'm getting hungry just thinking about it!  Okay.  Deep breath.  Focus.

It is a weeknight, so I really shouldn't be too ambitious.  I also don't want to go to the store.  Hmmm...  I do have some Fluff leftover from the holiday fudge.  And lots of graham crackers.  We all know how much I love a good s'more.  And my mini blow torch. 


Are you thinking what I'm thinking?  Oh, I do hope you're thinking s'more pie!

1 graham cracker crust
6 ounces milk chocolate
1/2 cup heavy cream 
2 cups Fluff (give or take, please don't try to actually measure Fluff!)
1/4 teaspoon sea salt

Place chocolate and cream in a heat-proof bowl.  Microwave in 30-second increments, stirring after each, until melted and smooth.  Cool to room temperature.  Whip with an electric mixer until light and fluffy.  Spread in crust. 


Top with Fluff.  With a small kitchen torch, lightly brown top.  (You could also do this with a couple of minutes under the broiler.)  Sprinkle the sea salt over the top. 


To slice, run a knife under hot water prior to each cut.

Now, before you say anything, I know.  My Pi Day pie is technically a tart.  Apparently, I only have one pie plate and it's at a friend's house.  Forgive me for cheating and for only owning one pie plate.  I promise I won't let it happen again. 
Anyway, this pie is seriously rich.  Yet, the butteryness of the crust and the hint of salt keep it from being too sweet.  This is definitely a s'more all grown up.  If it wasn't 30 degrees out, I might be in the mood to go camping.
Hope your Pi Day has been delicious.  When it comes to 3.14, keep it round...
Keep it sweet.

Pin It