Wednesday, December 29, 2010

Fudge Factor

I must admit, I have mixed feelings about fudge.  On one hand, I grew up with lots and lots of fudge.  I appreciate it's classic simplicity.  On another hand, it's absurdly sweet and sort of like half-hearted chocolate.  Yet, when done well (read: done with lots of marshmallow), it's creamy and smooth and practically screams "holidays!"

I reconcile all of these conflicting feelings by making it only once a year and eating it like I'll never see it again.  It seems to work.  I also cling mightily to the "fantasy fudge" recipe of my youth.  You know the one; it calls for a whole jar of marshmallow creme.  Oh, yeah.

Here's the classic recipe from Kraft Foods.
3 cups sugar
3/4 cup butter or margarine
1 small can (5 oz.) evaporated milk
1-1/2 pkg. (12 squares) BAKER'S Semi-Sweet Chocolate, chopped
1 jar (7 oz.) JET-PUFFED Marshmallow Creme
1 cup  chopped PLANTERS Walnuts
1 tsp. vanilla
LINE 9-inch square pan with foil, with ends of foil extending over sides of pan; set aside. Place sugar, butter and evaporated milk in large heavy saucepan. Bring to full rolling boil on medium heat, stirring constantly. Boil 4 min. or until candy thermometer reaches 234°F, stirring constantly to prevent scorching. Remove from heat.

ADD chocolate and marshmallow creme; stir until completely melted. Add walnuts and vanilla; mix well.
POUR immediately into prepared pan; spread to form even layer in pan. Let stand at room temperature 4 hours or until completely cooled; cut into 1-inch squares. Store in tightly covered container at room temperature.


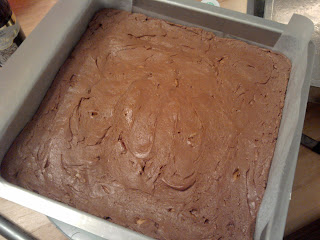
Literate Baker notes: I used a bag of semi-sweet chocolate chips.  I also used toasted pecans in place of the walnuts.

I've always used this recipe, growing up in the South where Jet-Puffed Marshmallow Creme reigns supreme.  Now that I live in New York, I've had no choice but to begin buying Marshmallow Fluff.  Honestly, I can't tell the difference.  That said, it wasn't until I came north that I learned of the existence of the Fluffer-nutter sandwich.  I've still never had one of those.  I think I'll go rectify that right now.

Keep it sweet.

Pin It

Sunday, December 26, 2010

The Truth About Truffles

There's a dirty little secret about truffles.  A secret Lindt and Godiva don't want you to know.  Truffles, for all their rich decadence, are ridiculously easy to make.  There.  I said it.  I hope the chocolate mafia isn't reading.  (I do, however, hope there is a chocolate mafia somewhere out there.)


Anyway.  Truffles.  Chocolate, cream, flavored love.  That's it.  More specifically...

1 pound chocolate, chopped (bittersweet, semi-sweet, or milk)
1 cup heavy cream
2 tablespoons flavored love, including a splash of vanilla extract and any of the following: coffee, flavored syrups for coffee, booze (I am especially fond of amaretto or coffee liqueur)

Bring the cream to just below a boil over medium heat.  Remove from heat and add chocolate.  Stir until chocolate is completely melted and mixture is smooth.  Add liquid love and stir to combine. 


Refrigerate until firm, at least two hours.  Using teaspoons or a very small ice cream scoop, drop onto waxed or parchment paper.  Roll each truffle into a rough ball and return to refrigerator.


Although perfectly tasty as is, truffles in this state can be rather messy to eat.  This can be rectified in a number of ways.  The easiest is to roll each ball in cocoa powder or confectioner's sugar.  While not especially glamorous, this method will give you the closest approximation to the truffle's fungal namesake.  Other low-maintenance options include rolling in finely chopped nuts, flaked coconut, or cookie/graham cracker crumbs. 

If you're looking for an extended shelf life or are feeling fancy, you can dip your truffles in melted chocolate.  Chop up eight ounces of the chocolate of your choice.  Melt about two-thirds of it in a heat-proof bowl over simmering water.  Remove from heat, add remaining chocolate and stir until melted and smooth.  Dip truffles one at a time, using a teaspoon and a small fork.  Place on waxed or parchment paper to set.

So, there you have it.  Truffles are not rocket science.  Heck, they're not even perfectly-flaky-pie-crust science.  They are a thoughtful-gift-or-party-item-sure-to-leave-some-unsightly-rejects-that-you-get-to-keep-for-yourself way to...

Keep it sweet. Pin It

Wednesday, December 22, 2010

A New Orleans State of Mind

If the post about beignets didn't do it, then this surely will.  I write today of the sweet and nutty confection sold in every New Orleans gift shop and the majority of truck stop convenience stores.  I speak of the praline.  And, in case you were wondering, you really should say prah-leen, not pray-leen.  Really.  You don't want to scream "tourist," do you?

Pralines have been around in Louisiana for over two hundred years.  They were born of French and Belgian candy-making techniques and the prevalence of pecans in New Orleans and the surrounding area.  (You can read a more thorough history of the praline here.)

As far as candy making goes, pralines are pretty simple, both in technique and ingredients.  My recipe of choice hails from the River Road cookbook, a publication of the Baton Rouge Junior League back in the day (1950s, perhaps?) that has gained massive popularity through the years.  I think my copy, a gift from a neighbor when I was in high school, was one of the first printings. 


One of my favorite parts of this particular book is that I know which recipes were my friend's favorites based on the pages that show the most battle scars.


Since you aren't blessed with such a treasure, I'll share the recipe with you...

2 cups brown sugar
1 cup white sugar
1 cup water
1 cup cream
3 cups pecans

Combine sugars, water, and cream in a heavy saucepan and cook over medium heat, stirring occasionally, until a candy thermometer reads 238 degrees. 


Remove from heat, add pecans.   


Stir vigorously until mixture begins to thicken and lighten in color.  Drop by teaspoon or tablespooonfuls onto waxed or parchment paper and allow to set.


Literate Baker notes:  I toast the pecans for about 10 minutes in a 350-degree oven ahead of time.  I add 1-2 teaspoons of vanilla extract and a good pinch of salt when I add the pecans.

These babies make a great gift, a wonderful addition to a cookie tray, and will easily keep in a sealed container for a couple of months.  The sweetness is truly balanced by the massive amount of pecans in them and the heavy cream gives them a wonderful texture.

I'd recommend a French Quarter vacation to just about anyone.  If you can't make that happen, bring a little of the French Quarter to you.  Pralines are a whole lot easier than crawfish etoufee and will most definitely...


Keep it sweet. Pin It

Monday, December 20, 2010

The Holiday Baker

I spent the weekend baking.  I also wrote holiday cards, blared Christmas music, and drank a fair amount of wine.  And I didn't have to shovel any snow.  It was fabulous.

This year, I took a practical-slash-strategic approach to my holiday baking.  I went for all things that would stay fresh for at least a couple of weeks.  This allows me to distribute things over a few days without fretting over stale cookies or crusty cupcakes.  I also went for all things bite-sized, so that one can easily enjoy one of everything without feeling like a hippopotamus. 

(Random aside:  Why do the radio stations what have played nothing but Christmas music since November 1 never ever play "I Want a Hippopotamus for Christmas?")

So, you ask, what's the lineup?  Well, in the cookie department, I went for Italian tri-colored bars and shortbread.  I also made truffles, chocolate fudge, and pralines.  The final palette is a little nut heavy, but I'm okay with that. 

I'll spend the rest of the week posting pics and recipes for each item.  In the meantime, I'll pay homage to the ultimate holiday baking tradition: the cutout cookie.  My friend Lindsay (author of the addictive Tales and Sales of a Shopaholic) made up a batch this weekend with her daughter, Lily. 


Although Lindsay likes to think of Lily as a shopaholic in the making, I think she's showing real promise as a baker.  Looks like she'll be a girl of many talents and excellent taste.

Hope you're all having a jolly good time with whatever celebrations and traditions you have this time of year.  Deck the halls and...

Keep it sweet. Pin It

Thursday, December 16, 2010

Ask the Literate Baker: Playing with Cookie Cutters

I've had three cake orders in the last few days, so I haven't had much time for baking for fun.  As a result, I don't have any fun culinary adventures to share with all of you.  Boo-hoo. So I shuffled into my dear friend and colleague Elizabeth's office and whined, "I don't have anything to write about.  Ask me a question."  Being a good friend and sometimes baker, she very nicely obliged...

At a recent party, she got a set of ABC cookie cutters.  If you aren't familiar with the Already Been Chewed cookie cutters, you should definitely check them out--Amazon.com carries them--they're sure to give you  a chuckle.  She wants to try them out, but she isn't a big fan of gingerbread.  What to do?

Well, the first thing that comes to mind is a good cut-out sugar cookie.  Anytime I do cut-outs, I use the No Fail Sugar Cookie recipe from Cake Central

6 cups flour
3 tsp. baking powder
2 cups unsalted butter
2 cups sugar
2 eggs
2 tsp. vanilla extract or desired flavoring
1 tsp. salt

Instructions

  1. Cream butter and sugar until light and fluffy. 
  2. Add eggs and vanilla. Mix well. 
  3. Mix dry ingredients and add a little at a time to butter mixture. Mix until flour is completely incorporated and the dough comes together.
  4. Chill for 1 to 2 hours.
  5. Roll to desired thickness and cut into desired shapes. Bake on ungreased baking sheet at 350 degrees for 8 to 10 minutes or until just beginning to turn brown around the edges. 
  6. This recipe can make up to 5-dozen 3” cookies.
Literate Baker notes:  I use a full tablespoon of vanilla and a teaspoon of almond extract.  Also, the baking time depends greatly on the size and shape of the cutter used.  Mine take up to 14 minutes to bake.
Although the traditional decorating medium is royal icing, you can just as easily use buttercream or even frosting from a can.  Sprinkles, chocolate chips, and  colored sugars work even if you have no decorating experience. The key is to have fun!  I have to confess, I'm one of those no-such-thing-as-too-much types.  I like my sugar cookies slathered with frosting and piled high and crunchy with this, that, and the other;  so much flotsam and jetsam you have to hold it from underneath or it will break under its own weight.  Ahem.  Anyway.

Of course, if you're feeling especially indulgent, there's no reason not to go for shortbread.  You all know how I feel about shortbread.  It rolls out just as nicely and keeps its shape when baked. 

If you go this route, I'd suggest no more decoration that some melted chocolate.  Place 1/4 to 1/2 cup chocolate chips in a microwave-safe bowl.  Heat for 20 seconds, stir; repeat this process until the chocolate is melted and smooth.  Spoon into a zip-top bag and seal.  Snip off one corner, then gently squeeze the chocolate out to make faces, clothing details, or squiggles.  Super easy and very sophisticated.

Put the baggie in a glass for easy filling.
I hope this has put you in the mood for some cookie love.  Feel free to share your thoughts, ideas, and adventures in cut-outs.  The messier, the better!

Keep it sweet. Pin It

Thursday, December 9, 2010

Cafe du Monde's Got Nothing on Me

Well, except being in the middle of the French Quarter of New Orleans.  Oh, and the fact that you can get powdered sugar all over the floor without getting in trouble.  But still.  I make really good beignets.


For anyone not in the know, beingets (pronounced bin-yays), a.k.a. French Market Doughnuts, are the signature item at Cafe du Monde, a New Orleans landmark that has been open since 1862.  Beignets have also been a signature item in my family, so much so that this hand-written 3x5 card is one of my most cherished possessions:


French Market Doughnuts
Pour 1 cup boiling water over 1/4 cup shortening.  Add 1/2 cup sugar, 1 teaspoon salt and 1 cup powdered milk.  When lukewarm, add 1 pack yeast dissolved in 1/2 cup lukewarm water.  Add 2 beaten eggs and 2 cups all purpose flour and beat well.  Then add 2 1/2-3 cups more flour.  Knead a few times and put in a greased bowl.  Grease top and put in refrigerator for at least one hour.

Literate Baker notes:  I've started substituting butter for the shortening.  I remained a purist for a very long time, but butter makes everything better.  Beignets are no exception.

To make the beignets, roll the dough on a floured surface to approximately 1/4 inch thick.  Cut into 2-ish inch squares.  Slightly irregular shapes are okay.


Place about an inch of vegetable oil in a pot over medium-high heat.  I've never used a thermometer, but I'm guessing it's between 350 and 375 degrees.  To test the oil, drop in a very small bit of dough.  It should bubble immediately and float within five seconds.  Carefully drop the beignets into the hot oil.  Flip after 1-2 minutes; they'll be puffed in the middle and golden brown.


Remove the beignets and drop immediately into a paper bag containing 1-2 cups of powdered sugar.  Close the bag and shake vigorously.  This is a lot of fun and offers superior coverage to the (albeit generous) sprinkling of sugar espoused by Cafe du Monde and most beignet shops.


 For the record, they don't reheat very well, so you should plan to eat them all.  If you're feeling an odd sense of restraint (or only have a couple of guests), the recipe can be halved and/or the dough will keep in the fridge for a few days.  Of course, they're mostly air, so eating ten should never be frowned upon.


  When I was younger, the lore was that my great-great aunt invented this recipe during the Great Depression (or was it World War II?), when it was nearly impossible to get whole milk.  I've decided there's more to it than that, though.  The ratio of ingredients is more like a hybrid of heavy cream and evaporated milk; the resulting dough is very enriched, something you notice in both the taste and texture of the final product.  These things will literally melt in your mouth.  With a hot cafe au lait?  Heaven.

I feel suddenly homesick.  Perhaps I just miss my Mamaw.  Funny how a food can do that to you.  I think I enjoy the memories as much as the beignets--a double dose of...

Keep it sweet. Pin It

Tuesday, December 7, 2010

Oh, the Weather Outside is Frightful!

I live in upstate New York.  We get a lot of snow.  We get so much snow that there is an entire vocabulary dedicated to snow--phrases like "lake effect" and "persistent bands" and "graupel."  We get so much snow that the cities of upstate New York have an annual competition called The Golden Snowball, which is awarded to the city with the most snowfall that season.  (Yes, Syracuse has won the last eight years in a row.)

Syracuse is currently in the throes of its first big snow storm.  I think we're pushing twenty inches at this point, with more expected before the week is through.  This moves us into first place, I believe, and is a healthy start toward our season average of ten feet.

It is not enough to close the city; it's really just enough to slow it down a bit.  It took me an hour to get home from work last night, for example.  Of course, my commute did include an unsuccessful errand in search of a new traction drive cable for our snow thrower.  By the time I made it through the door, I'd had just about enough.  Unfortunately, it turns out you really need the traction drive cable and there was much shoveling to be done.

My solution?  Really good, really indulgent, really easy baked goods.  Here's how:

1) Make a batch of box-mix brownie batter.  Spread in pan.
2) Add huge blobs of peanut butter directly from the jar.  Swirl slightly.


3) Bake according to package directions, minus about 10 minutes.

Yes, that's a frozen pizza next to my brownies.
4) Eat as much of the pan as you can without getting sick.

Note the snow drift in the window.

Between the pizza and the brownies, I felt strong enough to pile on the layers and pick up the shovel.  Thanks to a valiant effort by my husband earlier in the day, I was able to clear the driveway and sidewalk in about an hour and a half.  Of course, by the time I finished, a couple more inches had fallen where I'd began.  Oh, well.  Another day, another few inches, another pan of brownies.  Stay warm, dear readers, and...

Keep it sweet. Pin It

Monday, December 6, 2010

Pumpkin Gets Swirled

Thus far on The Literate Baker, pumpkin has gone puff, been rolled, and been Bundted (yes, that's a word; I say so).  For a mere four months in bloggy existence, that's a lot of pumpkin.  One more, and then I promise to give it a rest.  Really.

In addition to Ritz cracker pie, my Thanksgiving spread featured my first attempt at pumpkin cheesecake.  It seemed like a match made in heaven.  Of course, I consider most anything combined with cream cheese to be a match made in heaven, but still.  Silky pumpkin laden with spices, dense rich cheesecake--yum.


So, I scoured the internet, my cookbooks, magazines.  There are dozens, if not hundreds, of variations.  Ultimately, I settled on a swirled application.  I figured it would offer both the marriage I was looking for and the spirit of the individuals involved.  For the crust, I went gingersnap, using the recipe right on the back of the box.  For the filling, I used the Spiced Pumpkin Swirl Cheesecake from the Cooking Club of America:

FILLING
3 (8-oz.) pkg. cream cheese, softened
1 cup packed brown sugar, divided
3/4 cup sour cream
2 teaspoons vanilla extract
3 eggs
1 cup canned pure pumpkin
1 teaspoon ground cinnamon
1/2 teaspoon ground ginger
1/4 teaspoon ground cloves
1/4 teaspoon ground nutmeg

1. Heat oven to 325°F. Wrap outside of 9-inch springform pan with heavy-duty foil.
2. Beat cream cheese and 3/4 cup of the brown sugar in large bowl at medium speed just until blended. Beat in sour cream and vanilla. Add eggs one at a time, beating at low speed just until combined.
3. Whisk pumpkin, remaining 1/4 cup brown sugar, cinnamon, ginger, cloves and nutmeg in medium bowl. Whisk in 1 1/2 cups of the cheesecake mixture.
4. Spoon half of the remaining plain cheesecake mixture into crust. Top with half of the pumpkin filling. Repeat (do not spread evenly for best swirls). With knife or metal spatula, gently swirl through batter to achieve a marbled effect. Place springform pan in large shallow roasting or broiler pan; add enough hot tap water to come halfway up sides of springform pan.
5. Bake 60 to 70 minutes or until edges are puffed and top is dry to the touch. Center should move slightly when pan is tapped but should not ripple as if liquid.
6. Remove springform pan from roasting pan; remove foil. Cool on wire rack to room temperature. Refrigerate, uncovered, overnight. Store in refrigerator.


The water bath.
The flavors of this cheesecake were great.  The texture, for me, was almost too creamy.  I suppose I may have under-baked it.  It may also be the presence of the sour cream.  I prefer that almost counter-intuitive dense/fluffy thing that is the hallmark of a good cheesecake.  I'll try a couple more before settling on my standard.  Of course, I think I ate at least six of the sixteen slices, so, clearly, it was good enough to...

Keep it sweet. Pin It

Wednesday, December 1, 2010

The Great 50th Post Giveaway!

Update: The winner is Shooting Stars Mag!  Thank you all for becoming followers of The Literate Baker!  We'll be doing another giveaway in January, so stay tuned.

I interrupt the regularly-scheduled Thanksgiving-dessert redux with this special announcement:  this is my 50th post!  I'm having so much fun indulging both my sweet tooth and my propensity for loquaciousness.  It's even better knowing that it brings joy and carb comas to others.

To celebrate, I think a giveaway is in order.  Since the holiday season is upon us, party paraphernalia seems appropriate.  I've got just the thing...


This cute little guy is from Home & Garden Party.  He's about 12 inches high and 9 inches wide, sure to brighten any table.

And what's a party platter without something on it?  Not a party, that's for sure.  The winner will also receive a dozen Much Ado About Cake cake shots or truffles


How do you win this holiday cheer?  Easy-peasy.  Become a fan of The Literate Baker on Facebook or become a follower on Google.  If you already are one of those things, just post a comment that says, "Hey, me too!" below.  Do this by Friday, December 10, 2010 at 11 p.m. EST.  One winner will be chosen at random.  US entrants only. Winners will be notified by December 13th.

Keep it sweet. Pin It

Tuesday, November 30, 2010

Puttin' on the Ritz

The hustle and bustle of Thanksgiving (and, in my house, Thanksgiving company) has passed.  I hope that your holiday was filled with family and friends, as well as a feeling of gratitude and well-being.  Although I did not make the time to write, there was no shortage of baking exploits.  I promise to fill you all in on the (culinary) trials and triumphs of the recent days.

The first is a Thanksgiving staple in my family.  I've made it just about every year I can remember; my grandmother made it before that.  I speak of the Ritz Cracker Pie.

Now, before anyone mistakenly assumes I'm referring to that "mock apple" nonsense that used to be printed on the back of the box, let me clarify.  In my book, Ritz cracker pie is a sweet and salty delight of unknown origin that I believe made an appearance in a Pink Ladies Auxiliary Cookbook in the early 1980s.  It goes a little something like this:


Pie
3 egg whites
3/4 cup sugar
1 tsp. vanilla extract
1 sleeve Ritz crackers, coarsely crushed
1 cup toasted chopped pecans


Topping
1 tub whipped topping
2 T cocoa powder

OR
1 cup heavy cream
2 T sugar
2 T cocoa powder

Whip egg whites until soft peaks form.  Continue whipping while gradually adding sugar to form a stiff meringue.  Fold in vanilla, crackers, and pecans.  Spread into a lightly greased 9-inch pie pan, forming a rough shell. 

 Bake at 350 for 20 minutes.  Cool completely.

Sift cocoa powder over whipped topping or cream that has been whipped with sugar.  Spread in baked pie.  serve chilled.

Literate Baker notes:  You can crush the crackers right in the sleeve before you open it.  The original recipe calls for a full cup of sugar in the pie; I think that's too much.  The original recipe also calls for "Dream Whip" for the topping; I don't know if you can even buy that anymore.


 This pie is amazingly light and the perfect end to a rich holiday meal.  It's also light enough that you can have a piece of it and another pie.  Or cheesecake.  Or whatever.  You know.  It's also super easy to make and doesn't even require a pie crust.  I should make it more often.  I do have three sleeves of Ritz crackers left.  And look how sad the last piece looks.


 It's settled then.  When it comes to your favorite recipes, you don't have to wait for the holidays to...

Keep it sweet. Pin It

Friday, November 19, 2010

Baker About Town: Bella Bakery

Apparently, it's a pasticiotti.  That makes a hell of a lot more sense than "pasta chaute," which is how I attempted to spell it phonetically.  Considering my wacky spelling was of bastardized French influence, and that I know the basic difference between French and Italian, I should have known better.  Oh, well.

Right now, a few of you know what I'm talking about.  The rest of you probably think that more than my spelling is a little wacky.  Let me explain.

When I was in college, my husband's 100% Italian grandmother used to send him away with boxes and boxes of pastry after every visit or meal out.  Often, the box included these wonderful little pie-like creations.  They consisted of a crumbly, shortbread-esque crust and a filling of chocolate or vanilla pudding or lemon curd.

I. Loved.  Them.  Other than that, and sort-of how how say what they were called, I knew very little.  Over the years, I did learn where to find them.  My favorite spot now is a tiny Italian bakery that I only seem to pass on my way to and from the dentist.  (Yes, I appreciate the irony of this.)


Bella Bakery is located on State Fair Boulevard in Baldwinsville, New York.  They sell all the usual Italian cookies, some doughnuts, some bread.  Their case actually actually looks pretty nice.


But I only have eyes for the pasticiotti. 


Is it hard to see why?  I think not.  The custard is rich and creamy, the crust has just a hint of sweetness.  Oddly, I've never attempted to make these myself.  Perhaps it's time.  This recipe looks reasonable.  Hmmm...

As for the wonderful Italian lady who introduced me to them?  She is no longer with us, but loved dearly and remembered always.  We miss you Ida, and all the fabulous and fattening ways you tried to...


Keep it sweet. Pin It

Wednesday, November 17, 2010

Tart It Up

I've always had mixed feelings about pecan pie.  On one hand, I love pecans and I love pie.  On another, I often shy away from desserts I'd classify as super-sweet.  As a Southerner, I fee a little inauthentic not loving pecan pie.  It's not that I don't like it, I just...  What is it?  I know.  I'm not satisfied with the traditional goo-to-nut ratio.  Too much goo.  Not enough nut.  You know?

Rather than forfeit pecan pie altogether, I decided to look for alternatives.  Alternative #1: Put more stuff in the goo.  Chocolate chips surfaced in a few recipes I considered.  So did bourbon.  Alternative #2:  Have less goo.  This option manifested itself in the form of a tart.  Hmmm... Both alternatives sounded good, but I don't get to use my tart pan enough, so I opted for #2.

And so began my first attempt at Maple Pecan Tart (Bon Appetit, November 2007).

Crust:
1/2 cup (1 stick) unsalted butter, room temperature
1/4 cup sugar
1 large egg yolk
1/8 teaspoon salt
1 1/4 cups unbleached all purpose flour

Filling:
3 large eggs
1/2 cup (packed) golden brown sugar
1/2 cup pure maple syrup
1/2 cup dark corn syrup
1/4 cup (1/2 stick) unsalted butter, melted
1/8 teaspoon salt
1 1/2 cups coarsely chopped pecans
Whipped cream or vanilla ice cream

For crust:
Using electric mixer, beat butter in medium bowl until smooth. Add sugar, egg yolk, and salt; beat until blended. Add flour and beat just until dough begins to clump together. Gather dough into ball; flatten into disk. Roll out dough on lightly floured work surface to 10 1/2-inch round. Transfer to 9-inch-diameter tart pan with removable bottom. Press dough onto bottom and up sides of pan. Pierce dough all over with fork.
DO AHEAD: Can be made 1 day ahead. Cover and refrigerate.
Place crust in freezer 30 minutes before filling and baking.

For filling:
Preheat oven to 350°F. Whisk eggs and brown sugar in medium bowl until well blended. Whisk in maple syrup, corn syrup, melted butter, and salt. Stir in pecans. Pour filling into unbaked crust. Place tart on rimmed baking sheet.
Bake tart until filling is slightly puffed and set, about 40 minutes. Transfer to rack and cool. DO AHEAD: Can be made 1 day ahead. Tent loosely with foil and let stand at room temperature.
Cut tart into wedges and serve with whipped cream or ice cream.


Literate Baker Notes:  If you can get your hands on Grade B maple syrup, please do!  My tart pan was 10 inches; it worked fine, but my crust was a little thin.  I think that's a good enough reason to go buy a 9-inch pan.  Don't you?  If you don't have a reliable pecan supply (thanks, Mom!), I think walnuts would be equally nice.


The greatly-reduced volume of goo combined with added flavor of maple made this tart truly delightful.  It was even enjoyed by my husband (whose favorite part of pecan pie is the goo).  It's a perfectly classy way to tart it up and...

Keep is sweet.
Pin It

Monday, November 15, 2010

A Little Nutty

I don't think I've ever met a nut I didn't like. That said, I trade them all (even the pecans of my childhood) for an almond. Roasted, covered in chocolate, chopped up in cookies--all good in my book. And then... and then there's almond paste. Almond paste is made from sugar and ground almonds. It's the base for marzipan and for a host of other delectable delights.

At the top of this list are two traditional Italian treats, the tri-colored cookie and the pignoli. I didn't grow up with either of these cookies, but I have come to love them as my own. Through the years, I've become quite adept at the tri-colored, but I've never attempted the pignoli. Until now. It all started in a meeting. I was chatting with a couple of colleagues and one (who shall remain nameless for his own protection) went on and on about his mom's pignoli cookies.

In true Literate Baker fashion, I went back to my office and spent the better part of my lunch hour trolling for recipes. Although almond paste and egg whites and pine nuts featured prominently in every one, there was much variation. Some called for flour, some didn't. Some demanded confectioner's sugar, some granulated.

Normally, I would experiment until I found the version I liked best. Given the price of pine nuts, I wasn't too keen on that approach. I knew better than to ask an Italian woman for her recipe, so I asked my colleague if he could just find out whether or not I should be using flour. Apparently, that was the magical question. She was so appalled that I would even think about putting flour in them that she took pity on me and shared her recipe.  

This worked better than playing helpless female at Home Depot; I'll have to remember that for future use.

Now that you know the story, you know I can't give you the recipe. I can (obviously) tell you never to entertain a recipe that calls for flour. I can also tell you that the Pignoli Cookies II recipe published on allrecipes.com is a good place to start.

It's like no cookie dough I've ever seen.

Scooped out and sprinkled with pine nuts.
I may have beaten the egg whites a tad too much.  The cookies puffed a little bit more than I would have liked, leaving air pockets in them.  Otherwise, I think I'm in love.  The almond flavor is so intense and the texture is a crispy-chewy nirvana.  I contemplated cramming more pine nuts on top, but the flavor balance is just right, so I'm going to leave the ratio as is.


So, thanks, nameless colleague guy.  I've got a few set aside just for you.

Moral of the story?  Don't be afraid to beg.  Or bribe.  All's fair in love and cookies.  (Okay, that last part is a bit much, but I like the way it sounds.)  Go nuts everyone and...

Keep it sweet. Pin It

Friday, November 12, 2010

Technological Tangent

I feel strongly that every post on this blog should be about baking or desserts in some way, shape, or form.  I also feel strongly that exceptions are a key component of every rule.  Oh, and that loose interpretation has a place in most arenas (most, not all).  Therefore, dear readers, I write today of cell phones.

I've been wanting a data plan for a while.  Once I wrapped my head around the Android platform, I developed a serious envie for that as well.  I hemmed.  I hawed.  I scoped out my options.  I'm now spending much of my free time figuring out how in the world to work this bad boy:

The Samsung Intercept
Now, for the loose interpretation part.  Since starting this blog, having the ability to take and easily upload pictures has taken on new importance.  I'm not patient or skilled enough to upload things from my camera as often as a blog requires.  My phone (until yesterday) took very mediocre pictures, especially in low light.  This resulted in far from stellar photos in my posts, a big no-no for a blogger who wants to make her mark.

See, the phone is all about the blog!  Okay, not really, but it's a great bonus.  I think there might actually be a blogger app, but I'm going to focus on answering and making calls first.

If that's not enough for you, I went out at lunch and bought this to take a picture of:


That's me, always taking one for the team.  It's a peanut butter cookie.  Nothing too glamorous, but it's baked!  And it might just inspire me to whip up a batch this weekend.


Keep it sweet. Pin It

Wednesday, November 10, 2010

Completely Charmed

Not that long ago, I wrote a post about cake bling, shiny and sparkly accessories for wedding cakes and other baked goods.  At the time, I made a joke about diamond and ruby cupcakes.  I haven't happened upon those yet, although I'm sure they're out there somewhere.  I have found something nearly as sweet and a lot easier on the wallet--baking-themed charms!

It all started with a comment on one of my pumpkin posts by one "rosy+tart."  I then clicked on her blog and was treated to this post.  This, in turn, led me to Etsy and a veritable plethora of baker's delights.  I'm excessively fond of this one:


And this one:


Of course, if I get a bracelet, I could put both on it.  Along with this one:


And this one:


It would be very easy to get carried away.  Perhaps I'll put my good friend and fellow blogger Shopaholic on the hunt for the perfect combination.  After all, I can't let accessorizing take time away from baking.  Perhaps I can trade some cookies for coupon codes...

Keep it sweet. Pin It

Monday, November 8, 2010

Pumpkin Love, cont'd.

So, there are more leaves on the ground than on the trees.  We've officially "fallen back."  I now find myself desperately clinging to the last vestiges of fall.  One way I do that is by making, baking, and eating as much pumpkin as I can.  Not that I can't rock the pumpkin year round, but it just isn't the same.

As I was saying.  Pumpkin.  This weekend, it was a one-two punch.  For dinner, I made gnocchi in a pumpkin sauce with bacon, mushrooms, and maple.  I'd give you the recipe, but I can't.  This is a baking blog, you know.  (Of course, if you wrote me a fan-type email, I could probably be persuaded.  I'm easy like that.)  For dessert, I made one of my fall staples, a pumpkin Bundt cake.

The recipe for Pumpkin-Pecan Cake with Brown Sugar Frosting hails from the October/November 2003 issue of Cooking Pleasures magazine, the official publication of the Cooking Club of America. (I pull out this issue every fall and have the spots and drips on the pages to prove it.)  This cake is great because it comes together really quickly and the rich, buttery glaze provides a nice balance to the not-too-sweet cake.  It also stays moist for days.

CAKE
2 3/4  cups all-purpose flour
1/2  cup finely chopped toasted pecans*
1  tablespoon ground cinnamon
2  teaspoons baking powder
2  teaspoons ground ginger
3/4  teaspoon ground cloves
1/2  teaspoon finely ground pepper
1/2  teaspoon salt
2 1/4  cups packed brown sugar
1  cup light olive oil
4  eggs
1  (15-oz.) can pure pumpkin
2  teaspoons grated orange peel
FROSTING
1/4  cup unsalted butter
1/2  cup packed brown sugar
3  tablespoons milk
1 1/4  to 11/2 cups powdered sugar, sifted

1. Heat oven to 325ºF. Grease 12-cup Bundt pan with shortening.
2. In medium bowl, whisk flour, pecans, cinnamon, baking powder, ginger, cloves, pepper and salt to distribute all ingredients evenly.
3. In large bowl, beat 21/4 cups brown sugar and oil at low speed until well-mixed. Add eggs one at a time, beating well after each addition. Add pumpkin and orange peel; beat at low speed until blended. With mixer on low, slowly add flour mixture, beating just until incorporated. Spoon batter into Bundt pan.
4. Bake 60 to 65 minutes or until skewer inserted in center of cake comes out clean. Cool on wire rack 15 minutes; invert onto wire rack. Remove from pan; cool completely before placing on serving plate.
5. Meanwhile, melt butter in medium saucepan over medium heat. Stir in 1/2 cup brown sugar; bring to a full boil. Whisk in milk until smooth. Remove from heat; whisk in 1 1/4 cups of the powdered sugar until smooth and of glaze consistency. Add additional 1/4 cup powdered sugar, if necessary. Place in container with pouring spout. Immediately pour over cooled cake. Frosting sets up almost immediately, so slowly pour frosting over cake in one motion.**  For a smooth look, do not go back over frosting with spoon or spatula.

TIPS
*To toast pecans, spread on baking sheet; bake at 350ºF. for 7 to 10 minutes or until light golden brown.
**If frosting begins to thicken too much while pouring, place container in bowl of hot water and stir until thinner.

Literate Baker notes:  Canola oil works just as well as light olive oil in this recipe.  This time, I substituted one tablespoon of chai spice powder for all of the other spices and it worked really well.


Now, I'm not planning to turn my back on pumpkin once the snow begins to fall.  I will, however, move on to some of my wintry favorites.  I think, this year, I managed to hit the pumpkin highlights (even without a pie).  I hope you've enjoyed them with me.  Let's do it again next year.

Keep it sweet. Pin It