Tuesday, November 30, 2010

Puttin' on the Ritz

The hustle and bustle of Thanksgiving (and, in my house, Thanksgiving company) has passed.  I hope that your holiday was filled with family and friends, as well as a feeling of gratitude and well-being.  Although I did not make the time to write, there was no shortage of baking exploits.  I promise to fill you all in on the (culinary) trials and triumphs of the recent days.

The first is a Thanksgiving staple in my family.  I've made it just about every year I can remember; my grandmother made it before that.  I speak of the Ritz Cracker Pie.

Now, before anyone mistakenly assumes I'm referring to that "mock apple" nonsense that used to be printed on the back of the box, let me clarify.  In my book, Ritz cracker pie is a sweet and salty delight of unknown origin that I believe made an appearance in a Pink Ladies Auxiliary Cookbook in the early 1980s.  It goes a little something like this:


Pie
3 egg whites
3/4 cup sugar
1 tsp. vanilla extract
1 sleeve Ritz crackers, coarsely crushed
1 cup toasted chopped pecans


Topping
1 tub whipped topping
2 T cocoa powder

OR
1 cup heavy cream
2 T sugar
2 T cocoa powder

Whip egg whites until soft peaks form.  Continue whipping while gradually adding sugar to form a stiff meringue.  Fold in vanilla, crackers, and pecans.  Spread into a lightly greased 9-inch pie pan, forming a rough shell. 

 Bake at 350 for 20 minutes.  Cool completely.

Sift cocoa powder over whipped topping or cream that has been whipped with sugar.  Spread in baked pie.  serve chilled.

Literate Baker notes:  You can crush the crackers right in the sleeve before you open it.  The original recipe calls for a full cup of sugar in the pie; I think that's too much.  The original recipe also calls for "Dream Whip" for the topping; I don't know if you can even buy that anymore.


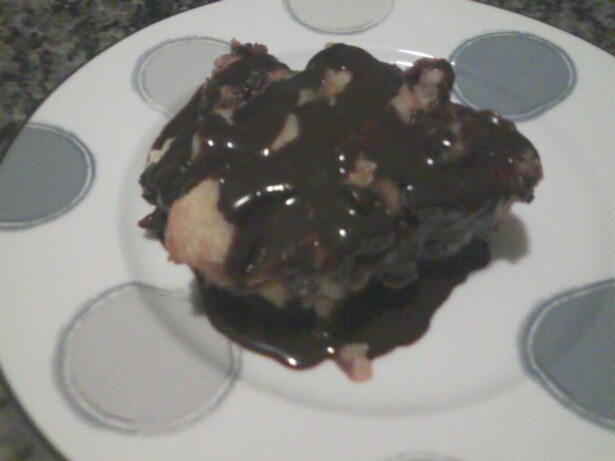
 This pie is amazingly light and the perfect end to a rich holiday meal.  It's also light enough that you can have a piece of it and another pie.  Or cheesecake.  Or whatever.  You know.  It's also super easy to make and doesn't even require a pie crust.  I should make it more often.  I do have three sleeves of Ritz crackers left.  And look how sad the last piece looks.


 It's settled then.  When it comes to your favorite recipes, you don't have to wait for the holidays to...

Keep it sweet. Pin It

Friday, November 19, 2010

Baker About Town: Bella Bakery

Apparently, it's a pasticiotti.  That makes a hell of a lot more sense than "pasta chaute," which is how I attempted to spell it phonetically.  Considering my wacky spelling was of bastardized French influence, and that I know the basic difference between French and Italian, I should have known better.  Oh, well.

Right now, a few of you know what I'm talking about.  The rest of you probably think that more than my spelling is a little wacky.  Let me explain.

When I was in college, my husband's 100% Italian grandmother used to send him away with boxes and boxes of pastry after every visit or meal out.  Often, the box included these wonderful little pie-like creations.  They consisted of a crumbly, shortbread-esque crust and a filling of chocolate or vanilla pudding or lemon curd.

I. Loved.  Them.  Other than that, and sort-of how how say what they were called, I knew very little.  Over the years, I did learn where to find them.  My favorite spot now is a tiny Italian bakery that I only seem to pass on my way to and from the dentist.  (Yes, I appreciate the irony of this.)


Bella Bakery is located on State Fair Boulevard in Baldwinsville, New York.  They sell all the usual Italian cookies, some doughnuts, some bread.  Their case actually actually looks pretty nice.


But I only have eyes for the pasticiotti. 


Is it hard to see why?  I think not.  The custard is rich and creamy, the crust has just a hint of sweetness.  Oddly, I've never attempted to make these myself.  Perhaps it's time.  This recipe looks reasonable.  Hmmm...

As for the wonderful Italian lady who introduced me to them?  She is no longer with us, but loved dearly and remembered always.  We miss you Ida, and all the fabulous and fattening ways you tried to...


Keep it sweet. Pin It

Wednesday, November 17, 2010

Tart It Up

I've always had mixed feelings about pecan pie.  On one hand, I love pecans and I love pie.  On another, I often shy away from desserts I'd classify as super-sweet.  As a Southerner, I fee a little inauthentic not loving pecan pie.  It's not that I don't like it, I just...  What is it?  I know.  I'm not satisfied with the traditional goo-to-nut ratio.  Too much goo.  Not enough nut.  You know?

Rather than forfeit pecan pie altogether, I decided to look for alternatives.  Alternative #1: Put more stuff in the goo.  Chocolate chips surfaced in a few recipes I considered.  So did bourbon.  Alternative #2:  Have less goo.  This option manifested itself in the form of a tart.  Hmmm... Both alternatives sounded good, but I don't get to use my tart pan enough, so I opted for #2.

And so began my first attempt at Maple Pecan Tart (Bon Appetit, November 2007).

Crust:
1/2 cup (1 stick) unsalted butter, room temperature
1/4 cup sugar
1 large egg yolk
1/8 teaspoon salt
1 1/4 cups unbleached all purpose flour

Filling:
3 large eggs
1/2 cup (packed) golden brown sugar
1/2 cup pure maple syrup
1/2 cup dark corn syrup
1/4 cup (1/2 stick) unsalted butter, melted
1/8 teaspoon salt
1 1/2 cups coarsely chopped pecans
Whipped cream or vanilla ice cream

For crust:
Using electric mixer, beat butter in medium bowl until smooth. Add sugar, egg yolk, and salt; beat until blended. Add flour and beat just until dough begins to clump together. Gather dough into ball; flatten into disk. Roll out dough on lightly floured work surface to 10 1/2-inch round. Transfer to 9-inch-diameter tart pan with removable bottom. Press dough onto bottom and up sides of pan. Pierce dough all over with fork.
DO AHEAD: Can be made 1 day ahead. Cover and refrigerate.
Place crust in freezer 30 minutes before filling and baking.

For filling:
Preheat oven to 350°F. Whisk eggs and brown sugar in medium bowl until well blended. Whisk in maple syrup, corn syrup, melted butter, and salt. Stir in pecans. Pour filling into unbaked crust. Place tart on rimmed baking sheet.
Bake tart until filling is slightly puffed and set, about 40 minutes. Transfer to rack and cool. DO AHEAD: Can be made 1 day ahead. Tent loosely with foil and let stand at room temperature.
Cut tart into wedges and serve with whipped cream or ice cream.


Literate Baker Notes:  If you can get your hands on Grade B maple syrup, please do!  My tart pan was 10 inches; it worked fine, but my crust was a little thin.  I think that's a good enough reason to go buy a 9-inch pan.  Don't you?  If you don't have a reliable pecan supply (thanks, Mom!), I think walnuts would be equally nice.


The greatly-reduced volume of goo combined with added flavor of maple made this tart truly delightful.  It was even enjoyed by my husband (whose favorite part of pecan pie is the goo).  It's a perfectly classy way to tart it up and...

Keep is sweet.
Pin It

Monday, November 15, 2010

A Little Nutty

I don't think I've ever met a nut I didn't like. That said, I trade them all (even the pecans of my childhood) for an almond. Roasted, covered in chocolate, chopped up in cookies--all good in my book. And then... and then there's almond paste. Almond paste is made from sugar and ground almonds. It's the base for marzipan and for a host of other delectable delights.

At the top of this list are two traditional Italian treats, the tri-colored cookie and the pignoli. I didn't grow up with either of these cookies, but I have come to love them as my own. Through the years, I've become quite adept at the tri-colored, but I've never attempted the pignoli. Until now. It all started in a meeting. I was chatting with a couple of colleagues and one (who shall remain nameless for his own protection) went on and on about his mom's pignoli cookies.

In true Literate Baker fashion, I went back to my office and spent the better part of my lunch hour trolling for recipes. Although almond paste and egg whites and pine nuts featured prominently in every one, there was much variation. Some called for flour, some didn't. Some demanded confectioner's sugar, some granulated.

Normally, I would experiment until I found the version I liked best. Given the price of pine nuts, I wasn't too keen on that approach. I knew better than to ask an Italian woman for her recipe, so I asked my colleague if he could just find out whether or not I should be using flour. Apparently, that was the magical question. She was so appalled that I would even think about putting flour in them that she took pity on me and shared her recipe.  

This worked better than playing helpless female at Home Depot; I'll have to remember that for future use.

Now that you know the story, you know I can't give you the recipe. I can (obviously) tell you never to entertain a recipe that calls for flour. I can also tell you that the Pignoli Cookies II recipe published on allrecipes.com is a good place to start.

It's like no cookie dough I've ever seen.

Scooped out and sprinkled with pine nuts.
I may have beaten the egg whites a tad too much.  The cookies puffed a little bit more than I would have liked, leaving air pockets in them.  Otherwise, I think I'm in love.  The almond flavor is so intense and the texture is a crispy-chewy nirvana.  I contemplated cramming more pine nuts on top, but the flavor balance is just right, so I'm going to leave the ratio as is.


So, thanks, nameless colleague guy.  I've got a few set aside just for you.

Moral of the story?  Don't be afraid to beg.  Or bribe.  All's fair in love and cookies.  (Okay, that last part is a bit much, but I like the way it sounds.)  Go nuts everyone and...

Keep it sweet. Pin It

Friday, November 12, 2010

Technological Tangent

I feel strongly that every post on this blog should be about baking or desserts in some way, shape, or form.  I also feel strongly that exceptions are a key component of every rule.  Oh, and that loose interpretation has a place in most arenas (most, not all).  Therefore, dear readers, I write today of cell phones.

I've been wanting a data plan for a while.  Once I wrapped my head around the Android platform, I developed a serious envie for that as well.  I hemmed.  I hawed.  I scoped out my options.  I'm now spending much of my free time figuring out how in the world to work this bad boy:

The Samsung Intercept
Now, for the loose interpretation part.  Since starting this blog, having the ability to take and easily upload pictures has taken on new importance.  I'm not patient or skilled enough to upload things from my camera as often as a blog requires.  My phone (until yesterday) took very mediocre pictures, especially in low light.  This resulted in far from stellar photos in my posts, a big no-no for a blogger who wants to make her mark.

See, the phone is all about the blog!  Okay, not really, but it's a great bonus.  I think there might actually be a blogger app, but I'm going to focus on answering and making calls first.

If that's not enough for you, I went out at lunch and bought this to take a picture of:


That's me, always taking one for the team.  It's a peanut butter cookie.  Nothing too glamorous, but it's baked!  And it might just inspire me to whip up a batch this weekend.


Keep it sweet. Pin It

Wednesday, November 10, 2010

Completely Charmed

Not that long ago, I wrote a post about cake bling, shiny and sparkly accessories for wedding cakes and other baked goods.  At the time, I made a joke about diamond and ruby cupcakes.  I haven't happened upon those yet, although I'm sure they're out there somewhere.  I have found something nearly as sweet and a lot easier on the wallet--baking-themed charms!

It all started with a comment on one of my pumpkin posts by one "rosy+tart."  I then clicked on her blog and was treated to this post.  This, in turn, led me to Etsy and a veritable plethora of baker's delights.  I'm excessively fond of this one:


And this one:


Of course, if I get a bracelet, I could put both on it.  Along with this one:


And this one:


It would be very easy to get carried away.  Perhaps I'll put my good friend and fellow blogger Shopaholic on the hunt for the perfect combination.  After all, I can't let accessorizing take time away from baking.  Perhaps I can trade some cookies for coupon codes...

Keep it sweet. Pin It

Monday, November 8, 2010

Pumpkin Love, cont'd.

So, there are more leaves on the ground than on the trees.  We've officially "fallen back."  I now find myself desperately clinging to the last vestiges of fall.  One way I do that is by making, baking, and eating as much pumpkin as I can.  Not that I can't rock the pumpkin year round, but it just isn't the same.

As I was saying.  Pumpkin.  This weekend, it was a one-two punch.  For dinner, I made gnocchi in a pumpkin sauce with bacon, mushrooms, and maple.  I'd give you the recipe, but I can't.  This is a baking blog, you know.  (Of course, if you wrote me a fan-type email, I could probably be persuaded.  I'm easy like that.)  For dessert, I made one of my fall staples, a pumpkin Bundt cake.

The recipe for Pumpkin-Pecan Cake with Brown Sugar Frosting hails from the October/November 2003 issue of Cooking Pleasures magazine, the official publication of the Cooking Club of America. (I pull out this issue every fall and have the spots and drips on the pages to prove it.)  This cake is great because it comes together really quickly and the rich, buttery glaze provides a nice balance to the not-too-sweet cake.  It also stays moist for days.

CAKE
2 3/4  cups all-purpose flour
1/2  cup finely chopped toasted pecans*
1  tablespoon ground cinnamon
2  teaspoons baking powder
2  teaspoons ground ginger
3/4  teaspoon ground cloves
1/2  teaspoon finely ground pepper
1/2  teaspoon salt
2 1/4  cups packed brown sugar
1  cup light olive oil
4  eggs
1  (15-oz.) can pure pumpkin
2  teaspoons grated orange peel
FROSTING
1/4  cup unsalted butter
1/2  cup packed brown sugar
3  tablespoons milk
1 1/4  to 11/2 cups powdered sugar, sifted

1. Heat oven to 325ºF. Grease 12-cup Bundt pan with shortening.
2. In medium bowl, whisk flour, pecans, cinnamon, baking powder, ginger, cloves, pepper and salt to distribute all ingredients evenly.
3. In large bowl, beat 21/4 cups brown sugar and oil at low speed until well-mixed. Add eggs one at a time, beating well after each addition. Add pumpkin and orange peel; beat at low speed until blended. With mixer on low, slowly add flour mixture, beating just until incorporated. Spoon batter into Bundt pan.
4. Bake 60 to 65 minutes or until skewer inserted in center of cake comes out clean. Cool on wire rack 15 minutes; invert onto wire rack. Remove from pan; cool completely before placing on serving plate.
5. Meanwhile, melt butter in medium saucepan over medium heat. Stir in 1/2 cup brown sugar; bring to a full boil. Whisk in milk until smooth. Remove from heat; whisk in 1 1/4 cups of the powdered sugar until smooth and of glaze consistency. Add additional 1/4 cup powdered sugar, if necessary. Place in container with pouring spout. Immediately pour over cooled cake. Frosting sets up almost immediately, so slowly pour frosting over cake in one motion.**  For a smooth look, do not go back over frosting with spoon or spatula.

TIPS
*To toast pecans, spread on baking sheet; bake at 350ºF. for 7 to 10 minutes or until light golden brown.
**If frosting begins to thicken too much while pouring, place container in bowl of hot water and stir until thinner.

Literate Baker notes:  Canola oil works just as well as light olive oil in this recipe.  This time, I substituted one tablespoon of chai spice powder for all of the other spices and it worked really well.


Now, I'm not planning to turn my back on pumpkin once the snow begins to fall.  I will, however, move on to some of my wintry favorites.  I think, this year, I managed to hit the pumpkin highlights (even without a pie).  I hope you've enjoyed them with me.  Let's do it again next year.

Keep it sweet. Pin It

Saturday, November 6, 2010

Pumpkin Goes Puffy

Generally, I'm opposed to puffy cookies.  I think cake should be soft and moist while cookies should be chewy or (as in the case of shortbread) crisp and buttery.  I am, however, willing to make a few exceptions.  Half-moons, for example, along with whoopie pies, are intrinsically puffy and amazingly tasty (but that's another post).  Today?  Today, I write of a recent addition to my puff party: the pumpkin cookie.

The recipe in question hails from the November 2007 issue of Martha Stewart's Everyday Food magazine.  I think it comes down to the fact that I can be seduced by just about anything pumpkin.  Chocolate-Glazed Pumpkin Cookies proved impossible to resist.

Ingredients
  • 2 cups all-purpose flour (spooned and leveled)
  • 1/2 teaspoon baking soda
  • 1/2 teaspoon baking powder
  • 1/2 teaspoon pumpkin-pie spice
  • 1/4 teaspoon salt
  • 1/2 cup (1 stick) unsalted butter, room temperature
  • 1 cup sugar
  • 1 large egg
  • 1 can (15 ounces) pure pumpkin puree
  • 4 ounces semisweet chocolate, chopped
Directions
  1. Preheat oven to 375 degrees. In a medium bowl, whisk together flour, baking soda, baking powder, pumpkin-pie spice, and salt; set aside.
  2. Using an electric mixer, beat together butter and sugar until light and fluffy. Add egg; beat until smooth. With mixer on low speed, alternately add flour mixture in two parts and pumpkin puree in one, beginning and ending with flour mixture; mix just until combined (do not overmix).
  3. Drop dough by heaping tablespoons onto two baking sheets, about 1 1/2 inches apart. Bake until puffed and edges are golden, 15 to 20 minutes, rotating sheets once during baking. Immediately transfer cookies to wire racks, and cool completely.
  4. When cookies have cooled, set them (still on rack) over a baking sheet or waxed paper. Place chocolate in a medium heatproof bowl set over (not in) a saucepan of simmering water; stir until almost melted. Remove from heat; stir until completely melted. Pour chocolate into a resealable plastic bag. Snip off a corner with scissors or a knife to make an 1/8-inch hole; pipe chocolate over cookies. Refrigerate until chocolate is firm, about 20 minutes.
Literate Baker notes:  I used my small ice cream scoop and ended up with 28 cookies.

A very soft, very orange dough.

The puff in action.

Fitting your baggie in a glass makes for easy filling.

Have fun with your drizzle.
 These are really good.  I did find, however, that the quality started to go down fairly quickly after the first day.  The solution?  Eat them all at once.  Or, you know, share.  I wouldn't say that I've converted to a puffy cookie kind of person, but there's nothing wrong with a little departure now and then.  It's one more way to...

Keep it sweet. Pin It

Tuesday, November 2, 2010

It's Gourmoo!

I recently learned of Gourmoo Cookoff being sponsored by Lactaid Milk.  To enter, they asked people to submit a video of themselves making a recipe featuring lactose-free milk.  I couldn't resist.

For about two days, I racked my brain for an amazing dessert that featured milk, but not cream or cream cheese.  The answer came to me on a rainy drive home from work: bread pudding!  Bread pudding is a decadent dessert that isn't too complicated to make and is easily enhanced by other ingredients and flavors.  I conducted a super scientific poll (I asked my husband) and the verdict was clear--chocolate chips and bananas.

I trolled around online, comparing recipes and techniques, then wrote my own version.  I gilded the lily a bit with the addition of a rich chocolate sauce.  I did a dry run and knew immediately that I had a winner.

You should definitely check out the video of me playing television chef.  (If it's before November 9, you can also vote for me or for any of the other contestants you like.)  After you've done that, you should try it out yourself.  Here's how:


Pudding
6 cups egg bread (such as challah or brioche), cubed
3/4 cup chocolate chips
2 bananas, sliced
1 banana, mashed
4 eggs
1 cup sugar
1 tablespoon vanilla extract
1/4 teaspoon salt
3 cups whole Lactaid milk

Sauce
1 cup chocolate chips
1/2 cup whole Lactaid milk
1/4 cup light corn syrup

  • Preheat oven to 325 degrees.
  • Place half of the bread in a 3-quart baking dish.  Add half of the chocolate chips and all of the sliced banana.  Top with remaining bread and chocolate chips.
  • In a mixing bowl, beat eggs slightly.  Add mashed banana, sugar, salt, and vanilla and blend well.  Stir in Lactaid milk.
  • Pour custard mixture over bread and allow to soak for 20-30 minutes.  Bake for approximately 45 minutes, until puffed and just set.
When you serve it up, it should look something like this...


As I mention in the video, it's great warm or cold.  It also makes a reasonably legitimate breakfast.  I may not be the Next Food Network Star, but that doesn't mean I have to act like it.  Why don't you try doing something a little out of the norm?  It's a sure-fire way to...


Keep it sweet. Pin It

Monday, November 1, 2010

The Apple Bakes Again

In addition to apple crisp, no fall is complete without an apple cake.  For me, the perfect apple cake is more apple than anything else.  It's also nutty, cinnamony, and beyond moist.  Fortunately, I have just such a recipe.

The Apple Walnut Cake from my dear friends at (surprise) Epicurious.com is fabulous and seriously easy to make.  You don't even need a mixer!


2 cups diced peeled tart green apples (such as Granny Smith; about 1 1/2 large)
1 cup sugar
1/2 cup (1 stick) unsalted butter, melted, cooled
1 large egg
1 1/4 cups all purpose flour
1 teaspoon ground cinnamon
1 teaspoon baking soda
1/2 teaspoon salt
1/2 cup coarsely chopped walnuts

Preheat oven to 375°F. Butter and flour 8x8x2-inch baking pan. Mix diced apples, sugar, butter and egg in large bowl to blend. Sift flour, cinnamon, baking soda and salt over. Add chopped walnuts; mix thoroughly.  Transfer mixture to prepared pan.  Bake until cake is brown and crusty on top and tester inserted into center comes out clean, about 45 minutes. Cool cake in pan on rack.

Literate Baker notes:  I like to make the full batter, then fold in the apples and walnuts.


There are so many apples and the batter is so thick that it's a bit difficult to spread in the pan.  Have no fear; as the apples soften and release their juices, everything comes together like magic.


I warn you, this will make your entire house smell like apples and cinnamon.  I cannot be held accountable if you eat the entire thing immediately.  I can suggest making a double batch.  I did.  I love a piece right out of the oven.  I love putting the leftovers in the fridge and eating them for breakfast.  Not that I'm looking to relive Monday morning or anything, but, um, is it time for breakfast?

Keep it sweet.
Pin It